Three commands to a running engine
Run the start script
./start-recallium.sh on macOS / Linux
start-recallium.bat on Windows
http://localhost:9001 - continue in the Setup Wizard below.Pick a model provider and you're done
The wizard walks you through three short steps in the browser. Bring your own API key, run fully local with Ollama, or connect an enterprise provider.
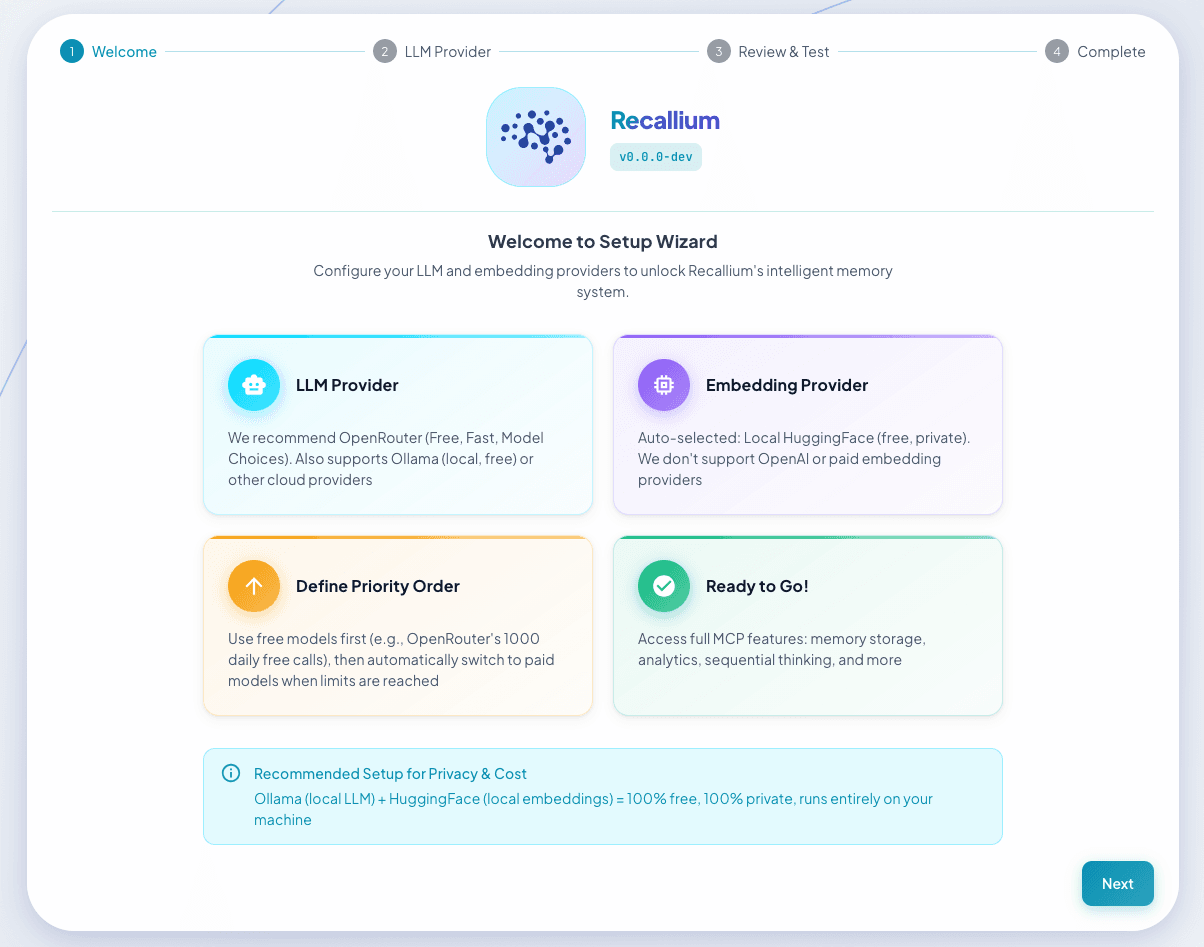
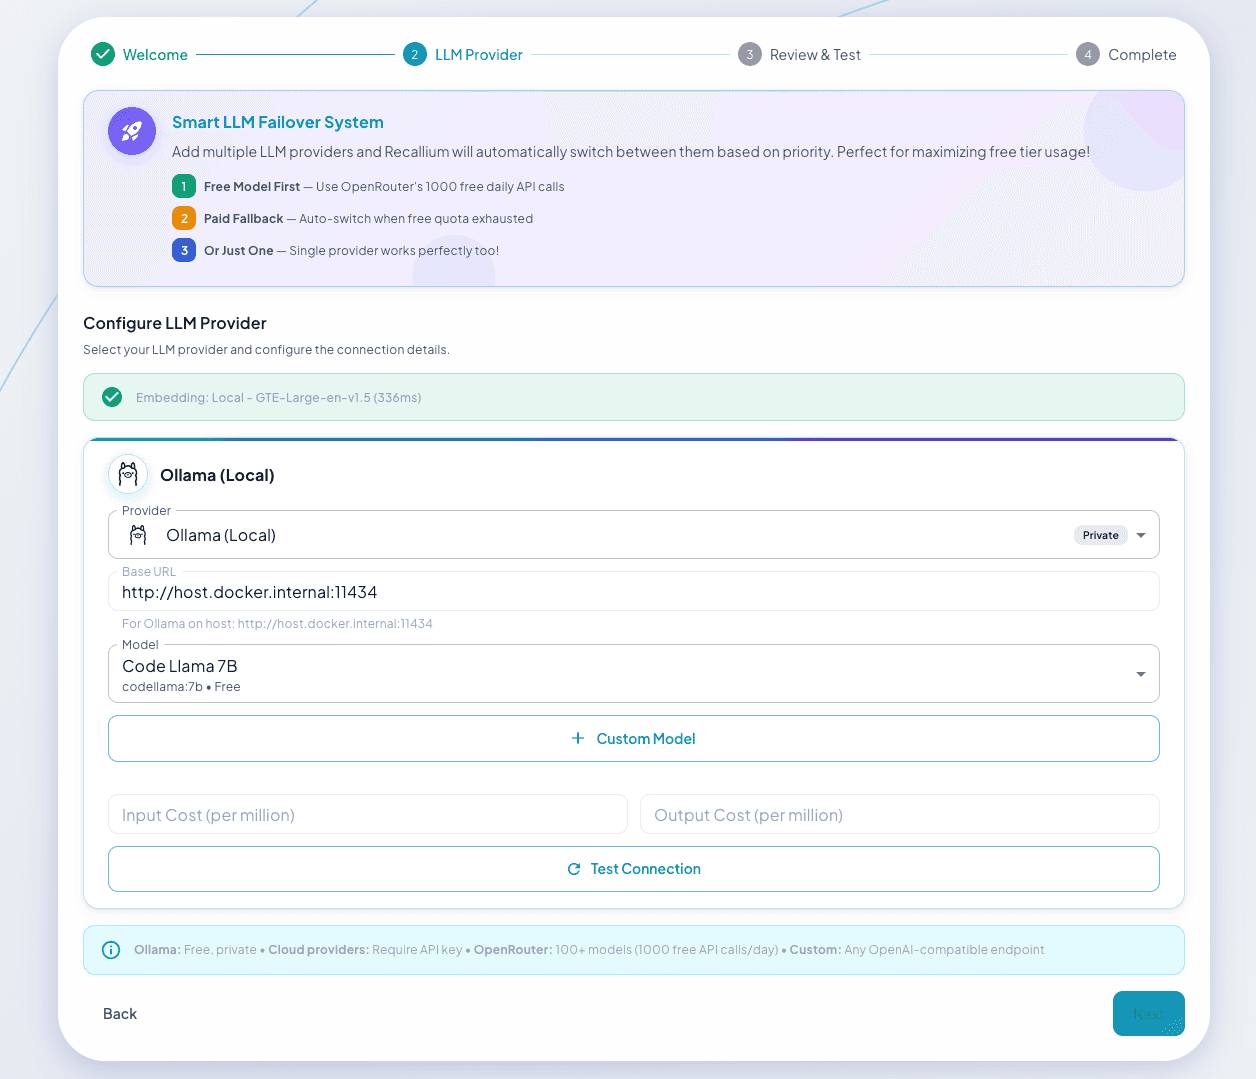
Choose your LLM provider
Test the connection before adding a provider. Recallium supports cloud, local, and enterprise backends.
Runs entirely on your machine - no API costs, fully private.
Enterprise-grade and compliance-ready for corporate environments.
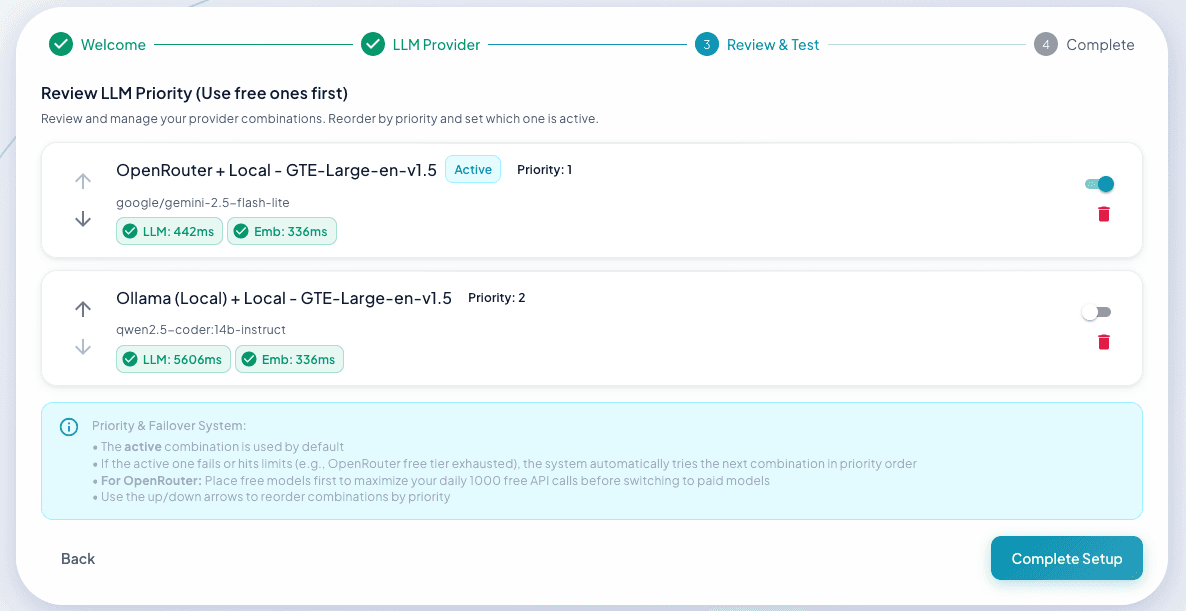
Set provider priority
Order your providers so Recallium fails over automatically if one is unavailable.
Done
Recallium's MCP tools are now available to every connected IDE and chat app.
Connect your IDE & chat apps
Point your client at the local MCP server. Here's Cursor - the same block works across editors.
Cursor
Open Settings → Cursor Settings → MCP → Add new global MCP server, then paste:
{
  "mcpServers": {
    "recallium": {
      "url": "http://localhost:8001/mcp",
      "transport": "http"
    }
  }
}
Claude CodeCLI
Add the server, then restart your session:
claude mcp add --transport http recallium http://localhost:8001/mcp
VS CodeEditor
Press Ctrl/Cmd + Shift + P → MCP: Add Server → HTTP → enter http://localhost:8001/mcp. Or add to your MCP config file:
{
  "mcp": {
    "servers": {
      "recallium": {
        "type": "http",
        "url": "http://localhost:8001/mcp"
      }
    }
  }
}
Claude DesktopChat App
- Find the
.jsonbextension file inclaude-desktop-extension/of the cloned repo - Open Claude Desktop →
Settings→Extensions - Click
Browse Extensions→Add Custom - Select the
.jsonbfile to install - Go to
Connectors → Recalliumand enable the tools you want
Bring your memories across
MiniMe was the first version of this memory system. Moving everything into Recallium takes two steps - your memories, projects, rules, and tasks all come with you.
- Open the MiniMe UI
- Go to Projects → Export
- Export all memories - downloads as a
.zip
- Install Recallium via the Quick Start
- Open the UI at
http://localhost:9001 - Go to Projects → Import
- Upload the MiniMe
.zip
Your memories, projects, rules, and tasks will all be imported. You can continue right where you left off.
Common fixes
Windows + Ollama setup
On Windows, Docker containers need your machine's IP address to reach Ollama.
Step 1: Configure the Ollama environment variable
- Search Start menu for "Edit the system environment variables"
- Click "Environment Variables"
- Under "System variables" → click "New"
- Name:
OLLAMA_HOST→ Value:0.0.0.0:11434 - Click OK → restart Ollama
Step 2: Add a Windows firewall rule (run as Administrator):
netsh advfirewall firewall add rule name="Ollama" dir=in action=allow program="C:\Users\<YOUR_USERNAME>\AppData\Local\Programs\Ollama\ollama.exe" enable=yes profile=private
The start-recallium.bat script will auto-detect your IP address.
Port conflicts
Edit install/recallium.env before starting:
HOST_UI_PORT=9001        # Web UI
HOST_API_PORT=8001       # MCP API
HOST_POSTGRES_PORT=5433  # PostgreSQL
Then restart: ./start-recallium.sh
Docker Compose (advanced)
Prefer to manage it yourself? From the repo:
cd install
docker compose --env-file recallium.env pull
docker compose --env-file recallium.env up -d
Tools not appearing in IDE
- Verify the container is running:
docker ps -f name=recallium - Check health:
curl http://localhost:8001/health - Fully restart your IDE after config changes
Ollama connection issues
# Ensure Ollama is running
ollama serve

# Verify models are downloaded
ollama list

# Test connection
curl http://localhost:11434/api/version
Reset everything data loss
⚠️ This permanently deletes all data:
cd install
./reset-recallium.sh   # Linux/macOS
# or
reset-recallium.bat    # Windows
Management commands
# View logs
docker logs -f recallium

# Stop
docker stop recallium

# Restart
docker restart recallium

# Update to latest version
cd install && ./start-recallium.sh
Everything your agents need to remember.
Star the repo, then dive into the help guide and benchmarks.